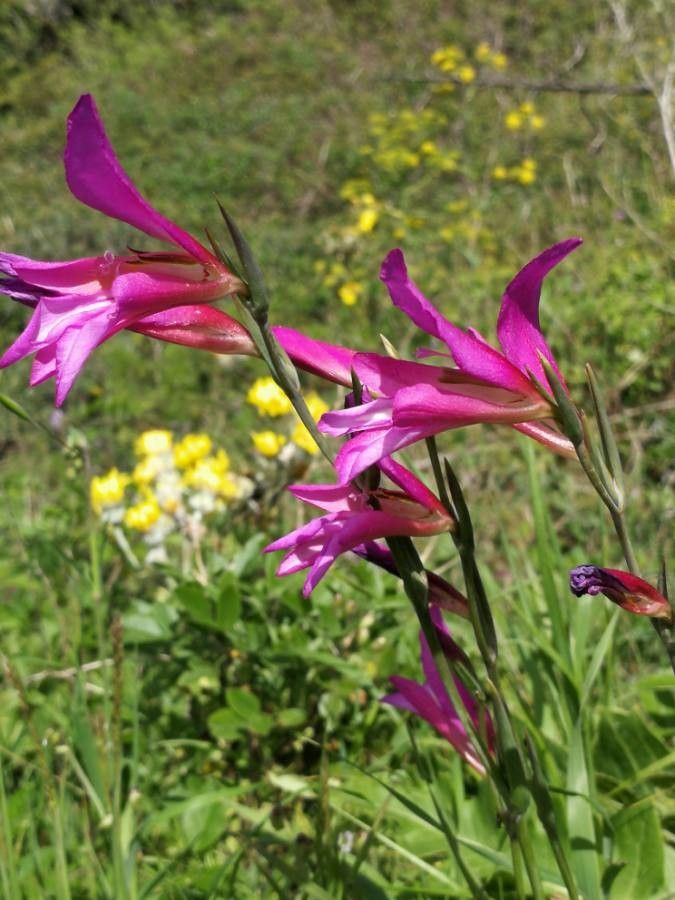
Hello, fellow garden enthusiasts! Let’s talk about a plant that has truly captured my heart over the years: Gladiolus illyricus. If you’ve ever seen its delicate, trumpet-shaped flowers, a lovely shade of soft pink or sometimes a more muted reddish-purple, you’ll understand its charm. They have this wonderful, almost wild grace that’s a joy to behold in the late spring and early summer garden.
Propagating Gladiolus illyricus is such a rewarding endeavor. It’s not the most common gladiolus people tend to grow from bulbs, which makes having your own little patch feel extra special. For beginners, I’d say it’s moderately challenging. It’s not as foolproof as, say, propagating a pothos, but with a little care and attention, you’ll absolutely be successful.
The Best Time to Start
The absolute best time to get your hands dirty with Gladiolus illyricus propagation is right after flowering has finished. For most of us, this means late summer or very early autumn. This is when the plant is naturally preparing for dormancy, and any bulbs or offsets it produces will be mature enough to give you a good start. Starting too early can stress the plant, and starting too late won’t give your new propagation enough time to establish before winter.
Supplies You’ll Need
Before we dive in, let’s gather our tools:
- Sharp pruning shears or a clean knife: For making precise cuts and dividing bulbs. Make sure they are clean to prevent disease.
- Well-draining potting mix: A good blend for bulbs is ideal. I often use a mix of peat moss, perlite, and a bit of slow-release organic fertilizer.
- Small pots or trays: For new cuttings or divisions.
- Perlite or coarse sand: To improve drainage when filling pots.
- Rooting hormone (optional but recommended): Especially helpful for cuttings.
- A watering can with a fine rose: For gentle watering.
- Labels: To keep track of what you’ve planted where and when!
- A small trowel: For scooping soil.
Propagation Methods
Gladiolus illyricus is primarily propagated by dividing its corms (which we often call bulbs). This is the most reliable and straightforward method.
Division is our go-to!
- Gently Excavate: Around late summer or early fall, after the foliage has started to yellow and die back naturally, carefully dig around the base of your existing Gladiolus illyricus. You want to expose the underground corms without damaging them. A garden fork can be helpful here, but be very cautious.
- Clean and Inspect: Once you’ve unearthed the clump, gently remove as much soil as you can. You’ll likely see several corms clumped together, sometimes with smaller cormels (baby corms) attached. Look for healthy, firm corms. Any that are soft, mushy, or show signs of rot should be discarded.
- Separate the Corms: This is where your clean pruning shears or knife come in. Carefully cut or twist apart the larger corms from the main clump. If you find smaller cormels, you can gently detach them too, although these will take longer to mature into flowering-sized plants. Crucially, make sure each division has at least one intact bud or “eye.” This is where new growth will emerge.
- Allow them to Dry (Optional but good): Some gardeners like to let the separated corms sit in a dry, airy place for a day or two to allow any cuts to heal over slightly. This can help prevent rot.
- Pot them Up: Fill your chosen pots with your well-draining potting mix. Make a small hole in the center and place your corm or cormel inside. For larger corms, plant them about 4-6 inches deep, with the pointed end (where the bud is) facing upwards. Smaller cormels can be planted shallower.
- Water Gently: Water the soil thoroughly but gently, ensuring the water reaches the roots of the corm.
The “Secret Sauce” (Pro Tips)
- Don’t Rush the Digging: I know it’s tempting to get going as soon as the flowers fade, but wait until the foliage has done its job and is truly dying back. The plant needs those leaves for energy to fuel the bulblets it’s creating underground. Patience here makes a huge difference.
- A Touch of Bottom Heat (For Cormels): If you’re trying to get those tiny cormels to sprout, giving them a little bottom heat can really speed things up. A seedling heat mat placed under the trays can encourage germination and root development, especially if your house is on the cooler side.
- Keep it Airy: When you dry your corms before potting, ensure good air circulation. This is key to preventing fungal issues from developing before your corms even have a chance to grow. Stagnant air is the enemy of healthy corms.
Aftercare & Troubleshooting
Once your corms are potted, find them a bright spot, but one that avoids intense direct sun until you see new growth emerging. Keep the soil consistently moist but not waterlogged. Think of it like a wrung-out sponge – damp, but not soggy.
You should start to see shoots emerging within a few weeks to a couple of months, depending on the size of the corm and the conditions.
The most common issue you might encounter is rot. This is a sure sign that the corm is staying too wet. If you notice a corm becoming soft, mushy, or developing a foul smell, it’s best to dig it up immediately and discard it to prevent it from spreading. Ensure your potting mix is draining exceptionally well, and water more judiciously. Sometimes, damping off (a fungal disease attacking seedlings) can happen if the environment is too humid and the soil too wet. Good air circulation is your best friend here.
A Encouraging Closing
Growing your own Gladiolus illyricus is truly a labor of love. It requires a bit of observation and a gentle hand, but the reward of seeing new life emerge from your efforts is immeasurable. Be patient with the process, enjoy the journey of nurturing these little corms, and soon you’ll be admiring those beautiful blooms in your own garden. Happy propagating!
Resource:
https://identify.plantnet.org/k-world-flora/species/Gladiolus%20illyricus%20W.D.J.Koch/data