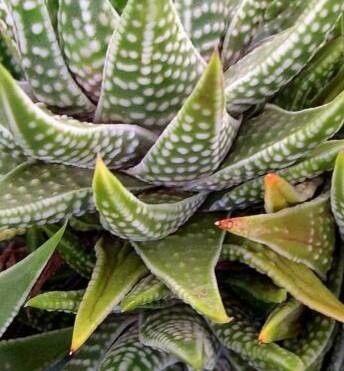
Oh, hello there, fellow plant lover! I’m so glad you’re here. Today, we’re diving into a gem of the succulent world: Tulista kingiana. If you’ve ever admired its striking rosette of thick, speckled leaves, you know it’s a real showstopper. And the best part? You can create more of these beauties yourself! Propagating succulents like Tulista kingiana is incredibly rewarding. It’s a wonderful way to expand your collection, share with friends, or even learn the rhythm of how plants grow. For beginners, I’d say Tulista kingiana falls into the moderately easy category. It’s not as foolproof as, say, a Sedum, but with a little attention, you’ll be successful.
The Best Time to Start
The absolute sweet spot for propagating Tulista kingiana is during its active growing season. For most succulents, this means late spring through summer. You’ll see them really taking off, developing new leaves and generally looking robust. This is when they have the most energy to put into making new roots. Trying to propagate in their dormant period (usually winter) is much less likely to yield good results.
Supplies You’ll Need
Gathering your tools beforehand makes the whole process much smoother. Here’s what I always have on hand:
- Well-draining soil mix: A commercial succulent or cactus mix is a great start. I often add a bit more perlite or pumice to ensure excellent drainage.
- Sharp, clean pruning shears or a sharp knife: For making clean cuts. Sterilize them with rubbing alcohol between uses to prevent disease.
- Rooting hormone (optional but recommended): Especially for cuttings, this can give them a helpful boost.
- A shallow tray or pot: For starting your cuttings or divisions.
- Watering can or spray bottle: For gentle watering.
- Patience! This is the most important tool of all.
Propagation Methods
Tulista kingiana is most commonly propagated through leaf cuttings or offsets (pups).
Leaf Cuttings
This is where the magic really starts to happen!
- Choose a healthy leaf: Look for plump, firm leaves on a mature plant.
- Make the cut: Carefully twist or cut the leaf from the stem. You want to ensure you get a clean break right at the base where it attaches to the main stem. If you see any green tissue remaining on the leaf where it broke off, that’s good!
- Let it callous: This is crucial! Place the leaf cutting on a dry surface in a well-ventilated area for 2-7 days. The cut end needs to dry out and form a callus. This prevents rot when you introduce moisture.
- Place on soil: Once calloused, lay the leaf cutting on top of your well-draining soil mix. Many people try to stick the cut end into the soil, but I find just resting it on top works wonders.
- Wait for roots: Keep the soil lightly moist – not wet. A gentle misting every few days is usually enough. Over the next few weeks to months, you should start to see tiny roots emerging from the calloused end, and eventually, a new little plantlet will form.
Offsets (Pups)
Tulista kingiana often produces small baby plants around its base. These are called offsets or pups.
- Identify pups: Look for smaller rosettes growing from the base of the mother plant.
- Gently separate: When the pups are a decent size (at least an inch or two tall), you can gently separate them. Use your clean knife or shears to cut the pup away from the mother plant, making sure to get a bit of its own roots if possible.
- Let it callous: Just like with leaf cuttings, allow the cut surface of the pup to callous over for a day or two.
- Plant it: Plant the calloused pup into its own pot of well-draining soil.
- Water sparingly: Water gently after planting and then allow the soil to dry out before watering again.
The “Secret Sauce” (Pro Tips)
Here are a couple of things I’ve learned over the years that really make a difference:
- When propagating via leaf cuttings, if you attempt to stick the entire leaf into the soil, you often just run the risk of the leaf rotting before roots have a chance to form. Letting the calloused end simply rest on the soil surface is far more effective for Tulista kingiana.
- For both leaf cuttings and pups, a little bit of bottom heat can significantly speed up root development. If you have a seedling heat mat, placing your tray on it when temperatures are cooler can give your cuttings a real boost. Just make sure the mat doesn’t dry out your soil too quickly.
Aftercare & Troubleshooting
Once you see those tiny roots or a new plantlet forming, congratulations! Now it’s time for nurturing.
- Watering: Continue to water sparingly. Allow the soil to dry out completely between waterings. Overwatering is the fastest way to kill a new succulent.
- Light: Provide bright, indirect light. Too much direct sun can scorch delicate new growth.
- Troubleshooting:
- Rot: If a leaf cutting turns mushy, black, or smelly, it’s likely rotten. Unfortunately, there’s no coming back from that. Ensure your pieces are well-calloused and you’re not overwatering.
- No activity: If after several weeks or months there’s no sign of roots or a pup, don’t despair. Some plants are just slower than others. Ensure it’s getting adequate light and isn’t being overwatered. Sometimes, a very gentle nudge of the soil to check for roots can cause a slight disturbance that encourages growth.
A Encouraging Closing
And there you have it! Propagating Tulista kingiana is a journey of patience and observation. Don’t be discouraged if your first attempt isn’t perfect. The beauty of nature is that it’s resilient, and with a little practice, you’ll be creating a whole colony of these gorgeous succulents. Enjoy the process, and happy growing!
Resource: