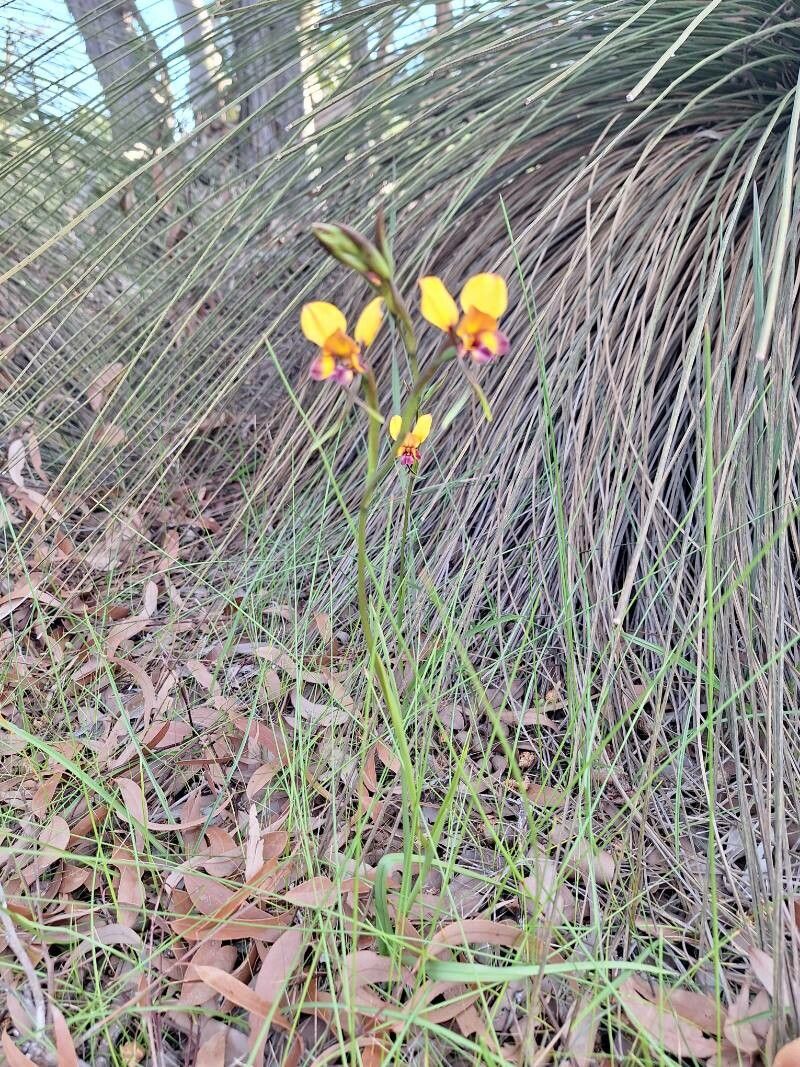
Ah, Diuris corymbosa! You’ve got great taste. Also known as the ‘Common Donkey Orchid’ or ‘Purple Diuris’, these native Australian beauties are just delightful. Their vibrant, often yellow and purple blooms bring such a cheerful splash to the garden landscape. Propagating them and watching those little shoots emerge is a truly satisfying experience – it’s like unlocking a little bit of nature’s magic right in your hands. Now, are they a breeze for absolute beginners? Honestly, they can be a little fussier than your average pothos, but with a bit of focused attention, I’ve seen plenty of folks new to plant propagation fall in love with the process using these orchids. Don’t let that deter you!
The Best Time to Start
For Diuris corymbosa, timing is key. You’ll want to propagate when the plant is actively growing but not in its peak flowering phase. Think of it as catching them at a good point where they have plenty of energy to spare for new growth. This usually falls in late spring or early summer, after the main blooming period has finished and the plant is focusing on vegetative growth. Avoid trying to propagate when the plant is stressed from extreme heat or during its dormant period.
Supplies You’ll Need
Before we get our hands dirty, let’s gather our tools. Having everything ready makes the whole process smoother.
- Clean, sharp pruning shears or a craft knife: For precise cuts.
- Well-draining potting mix: A good orchid mix or a blend of perlite, coir, and a little orchid bark is ideal.
- Small pots or propagation trays: With drainage holes! This is crucial.
- Rooting hormone (optional but recommended): Look for one formulated for orchids or softwood cuttings.
- Clear plastic bags or a propagation dome: To create a humid environment.
- Watering can or mister: For gentle watering.
- Labels and a permanent marker: To keep track of your new babies!
Propagation Methods
Diuris orchids are typically propagated through division, which is the most reliable method for this particular genus. While other orchid types might lend themselves to stem cuttings or even seed, division is where you’ll see the most success with Diuris corymbosa.
Here’s how we do it:
- Gently excavate: The best time to divide is when the plant is just finishing flowering but still has some green growth. Carefully unpot your Diuris corymbosa. Knock away as much of the old soil as you can, being mindful of the root system.
- Locate division points: Look for where the pseudobulbs (those swollen, stem-like structures) are growing away from the main clump. You want to find spots where you can see at least 2-3 healthy pseudobulbs and some supporting roots.
- Make the cut: Using your sterilised pruning shears or knife, gently but firmly separate the divisions. Don’t yank! You want to ensure each division has a good number of roots attached. If a division has very few roots, it’s okay, but it will require a bit more patience and care.
- Inspect and trim: Remove any dead or damaged roots or old, shriveled pseudobulbs. This helps the plant focus its energy on healthy growth. You can dust the cut surfaces with a fungicide if you’re concerned about rot, though a clean cut on a healthy plant often heals well.
- Pot them up: Prepare your new pots with your well-draining mix. Plant each division so that the tops of the pseudobulbs are just at or slightly above the surface of the soil. You don’t want to bury them too deeply.
- Initial watering: Water lightly to settle the mix around the roots. Don’t drench them.
The “Secret Sauce” (Pro Tips)
Now for a couple of my little tricks that have made a difference for me over the years:
- Don’t overwater the divisions: This is probably the biggest pitfall. Newly divided orchids don’t have a large root system to take up much water. They’re much more susceptible to rot than established plants. Water sparingly, only when the top layer of the potting mix feels dry. Misting the leaves lightly can also help maintain humidity without waterlogging the roots.
- Provide some bottom warmth: While not strictly essential, my Diuris divisions have always done better with a gentle warmth from below. A propagation mat set to a low temperature (around 70-75°F or 21-24°C) can really encourage root development. It mimics the warmth of spring soil and gives them a good start.
Aftercare & Troubleshooting
Once your divisions are potted, be patient. This is where your nurturing really shines.
- Humidity is your friend: Place the pots in a location with good air circulation but high humidity. Covering them with a clear plastic bag (poke a few holes for ventilation) or placing them in a propagation dome helps create that humid microclimate they love.
- Bright, indirect light is best: Avoid direct hot sun, which can scorch the new growth. A bright windowsill with sheer curtains or a spot under shade cloth is perfect.
- Watch for rot: The most common sign of failure is rotting pseudobulbs or leaves, often appearing mushy and brown. This almost always points to overwatering or poor drainage. If you see this, you may need to carefully repot the affected division, remove the rotted parts, and try again with drier conditions.
- Signs of success: Healthy new growth, a new leaf emerging from a pseudobulb, or the appearance of new roots (you might see them poking out of the drainage holes) are all excellent signs that your propagation is working! This can take several weeks, so don’t get discouraged.
A Word of Encouragement
Propagating Diuris corymbosa takes a gentle touch and a good dose of patience. Not every division will make it, and that’s perfectly okay! Think of each attempt as a learning opportunity. Celebrate the successes, learn from the challenges, and most importantly, enjoy the process of nurturing these beautiful orchids. Happy growing!
Resource:
https://identify.plantnet.org/k-world-flora/species/Diuris%20corymbosa%20Lindl./data