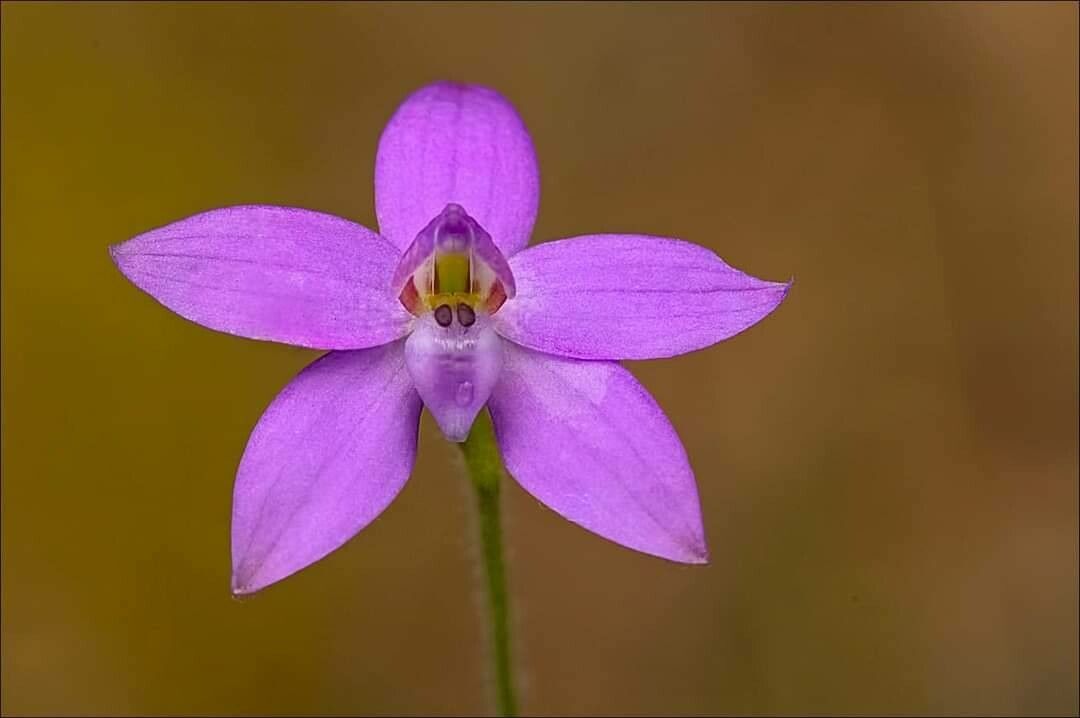
Oh, let me tell you about Caladenia minorata. If you’ve ever seen one of these beauties in bloom, you know exactly why I’m so excited to share how to bring more of them into your garden – or someone else’s! They have this delicate, almost ethereal charm, with their unique flower shapes and often subtle, captivating colors. Propagating them isn’t just about adding to your collection; it’s about experiencing the thrill of coaxing new life from an existing plant. It can be a bit of a journey, honestly. For absolute beginners, it might feel a touch challenging, but with a little patience, you’ll be well on your way!
The Best Time to Start
For Caladenia minorata, the sweet spot for propagation is generally after flowering has finished and the plant is moving into its active growth phase – usually in late spring or early summer. This is when the plant has stored up good energy reserves and is best equipped to put them into developing new roots and shoots. Avoid propagating when the plant is dormant or stressed by extreme heat or cold.
Supplies You’ll Need
Here’s what I always have on hand when I’m ready to get my hands dirty:
- Sharp, sterile pruning shears or a sharp knife: Cleanliness is key to preventing disease.
- A well-draining potting mix: I usually go for a blend that’s high in organic matter but also has plenty of perlite or coarse sand for aeration. Something like a terrestrial orchid mix is often perfect.
- Small pots or trays with drainage holes: These are essential for preventing waterlogged roots.
- A rooting hormone (optional but helpful): For Caladenia, I often find a powder or gel to be quite beneficial, especially for cuttings.
- A spray bottle: For gentle misting.
- Clear plastic bags or a propagation dome: To create a humid environment.
- Soft brush or twig: To gently handle delicate plant parts.
Propagation Methods
While some orchids are notoriously tricky, Caladenia minorata can often be propagated successfully through division, which is my preferred and most reliable method.
Division:
This is like giving your plant a little haircut and a new lease on life!
- Gently unpot your Caladenia. Carefully loosen the soil from the roots. You’re looking for where the plant naturally wants to separate into distinct sections, each with its own roots and at least one or two pseudobulbs or leaf bases.
- Identify healthy divisions. Look for sections that have good root development and firm pseudobulbs. Avoid any that look mushy or dried out.
- Carefully separate the divisions. You can often gently pull them apart. If they are stubborn, use your sterile knife or pruning shears to make a clean cut. Make sure each division has roots.
- Pot up the divisions. Plant each division in its own small pot filled with your prepared, well-draining mix. Ensure the top of the pseudobulb is just at or slightly below the soil surface.
- Water lightly. Give them a gentle watering to settle the soil.
The “Secret Sauce” (Pro Tips)
Here are a few things I’ve learned over the years that make a real difference:
- Never let the leaves of your young divisions touch the water, especially if you’ve used a propagation dome or bag. This is a fast track to rot. I always make sure my potting mix is firm enough that the leaves are held above the surface.
- Bottom heat can be a game-changer, particularly for divisions still establishing their roots. A gentle seedling heat mat set to around 70-75°F (21-24°C) can significantly speed up root development. It mimics the warmth of spring soil.
- Don’t overwater, ever! This is probably the most common mistake with orchids. The goal is consistently moist, not soggy. Let the top inch of the soil dry out slightly between waterings.
Aftercare & Troubleshooting
Once your divisions are potted, place them in a bright spot that gets indirect light. Keep the humidity up by misting the air around them or by using that propagation dome or plastic bag, but ensure good air circulation to prevent fungal issues.
You’ll know things are going well when you start to see new leaf growth or the emergence of tiny roots from the nodes. This can take anywhere from a few weeks to a couple of months.
The main thing to watch out for is rot. If you see mushy, brown stems or leaf bases, it’s a clear sign of overwatering. Unfortunately, if rot sets in deep, it can be hard to save. If you catch it early, you might be able to cut away the affected parts with a sterile knife and try to let the remaining healthy section dry out a bit more.
A Encouraging Closing
Propagating Caladenia minorata is a rewarding experience. It takes a bit of observation and a gentle hand, but seeing those tiny new plants take hold is incredibly satisfying. Be patient with yourself and with the plants. Each attempt is a learning opportunity, and soon enough, you’ll be sharing these gorgeous plants with everyone you know. Happy growing!
Resource:
https://identify.plantnet.org/k-world-flora/species/Caladenia%20minorata%20M.A.Clem./data