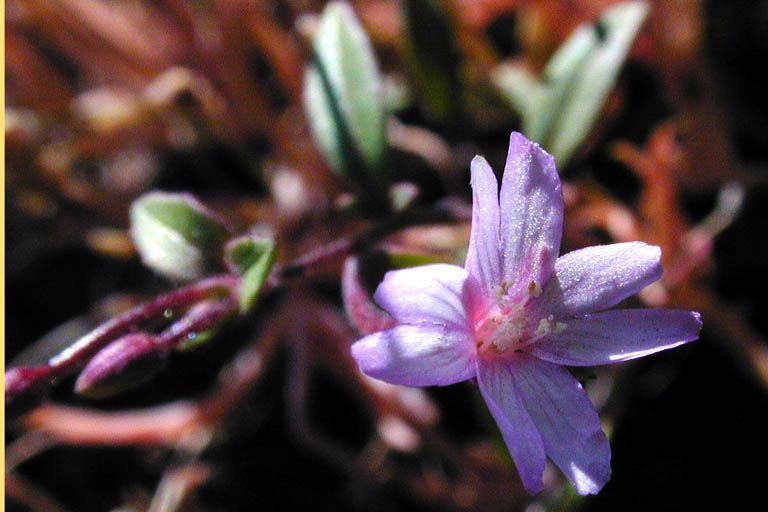
Hey there, fellow plant lovers! I’m so excited to chat with you today about a little gem that’s captured my heart over the years: Epilobium minutum, or as it’s sometimes charmingly called, California fuchsia. If you’re looking for a plant that’ll splash your garden with vibrant color and absolutely hum with pollinator activity, this is it. And guess what? Propagating it is a wonderfully rewarding way to expand your collection, or even share the magic with friends. Don’t let the “fuchsia” in its name fool you; Epilobium minutum is actually surprisingly easy to propagate, making it a fantastic choice for seasoned gardeners and beginners alike.
The Best Time to Start
For the highest success rates, I’ve found that starting your Epilobium minutum propagation in late spring to early summer is your best bet. This is when the plant is actively growing and has plenty of energy to put into developing new roots. You’re looking for young, yet firm stem sections – not the brand-new, floppy bits, but not the woody old stems either. Think of it as the “sweet spot” of new growth.
Supplies You’ll Need
Gathering your supplies beforehand makes the whole process much smoother. Here’s what you’ll want to have on hand:
- Sharp Pruning Shears or a Craft Knife: For clean cuts.
- Small Pots or Seedling Trays: With good drainage holes.
- Propagation Mix: A light, airy blend. I like to use a 50/50 mix of perlite and a good quality seed-starting mix, or even a bit of sand can be added for extra drainage.
- Rooting Hormone (Optional but Recommended): A powder or gel to give your cuttings a boost.
- Watering Can with a Fine Spray Nozzle: To avoid disturbing your cuttings.
- Clear Plastic Bags or a Domes: To create a humid environment.
- Labels and a Marker: To keep track of your projects!
Propagation Methods
While Epilobium minutum can be grown from seed, my favorite and most reliable method is through stem cuttings. It’s straightforward and gives you a plant that’s genetically identical to the parent.
Stem Cuttings:
- Select Your Cuttings: Head out to your healthy Epilobium minutum plant. Look for stems that are about 4 to 6 inches long. Make a clean cut just below a node – that’s the point where a leaf emerges from the stem.
- Prepare the Cuttings: Gently remove the lower leaves from your cuttings, leaving just a few at the very top. This prevents leaves from rotting when they’re buried in the soil. If your cuttings are particularly long, you can even trim the remaining leaves in half to reduce water loss.
- Apply Rooting Hormone (If Using): Dip the cut end of each stem into your rooting hormone powder or gel, tapping off any excess.
- Plant Your Cuttings: Fill your small pots or trays with your propagation mix. Make a small hole in the soil with your finger or a pencil. Insert the cutting into the hole, making sure the nodes where you removed leaves are below the soil line. Gently firm the soil around the stem. You can usually fit 2-3 cuttings per small pot.
- Water Gently: Use your fine spray nozzle to water the soil thoroughly. You want it moist but not waterlogged.
- Create Humidity: Cover the pots with a clear plastic bag (making sure the leaves don’t touch the plastic if possible) or place them under a clear dome. This creates a mini-greenhouse effect, keeping the humidity high which is crucial for cuttings to root.
- Provide Light: Place your pots in a spot with bright, indirect light. Avoid direct sun, as it can scorch your delicate cuttings.
The “Secret Sauce” (Pro Tips)
Now, let me share a couple of little tricks that have always served me well with cuttings:
- The “Shank” Technique: When you’re preparing your cuttings, sometimes making a slight slit or two up the bottom inch of the stem (after dipping in rooting hormone) can help expose more cambium tissue. Think of it as giving the plant more “surface area” to form those new roots. Be gentle, though!
- Bottom Heat is Your Friend: If you can, placing your pots on a gentle heating mat designed for seedlings can significantly speed up root formation. It mimics the warmth of the soil in summer and really encourages those roots to get going. You don’t need it scorching hot, just a nice, cozy warmth.
Aftercare & Troubleshooting
Be patient! It can take anywhere from 2 to 6 weeks for roots to develop. You’ll know your cuttings are rooting when you gently tug on a stem and feel resistance, or better yet, when you see tiny new leaves or shoots emerging.
Once you see signs of rooting, you can start to gradually acclimate your new plants to normal conditions. Start by removing the plastic bag or dome for a few hours a day, slowly increasing the time until they are used to open air. Continue to keep them in bright, indirect light. Water them when the top inch of soil feels dry.
Now, about those inevitable little hiccups! The most common problem is rot. This usually happens if the soil is too wet and the air circulation is poor. If you see stems turning mushy or slimy, or if mold appears on the soil surface, it’s a sign of overwatering or too much humidity. Don’t be afraid to remove any affected cuttings immediately to prevent it from spreading. Sometimes, simply increasing air circulation and letting the soil dry out a bit more between waterings can save the situation. If a cutting just seems to wither and shows no signs of life after a good few weeks, it simply means it didn’t take. It’s all part of the learning process!
A Encouraging Closing
Propagating Epilobium minutum is such a fulfilling endeavor. It’s a chance to connect with nature on a deeper level, to witness new life emerge from a simple stem. Don’t get discouraged if a few of your cuttings don’t make it – every gardener has those moments! Just keep trying. Enjoy the process, celebrate your successes, and soon you’ll have a garden positively buzzing with these beautiful blooms. Happy propagating!
Resource:
https://identify.plantnet.org/k-world-flora/species/Epilobium%20minutum%20Lindl.%20ex%20Lehm./data