Oh, hello there! I’m so glad you stopped by. Today, we’re diving into a topic that truly makes my heart sing: coaxing new life from our beloved plants. Specifically, we’re going to talk about the utterly charming Stelis emarginata.
Welcoming More Stelis emarginata into Your World
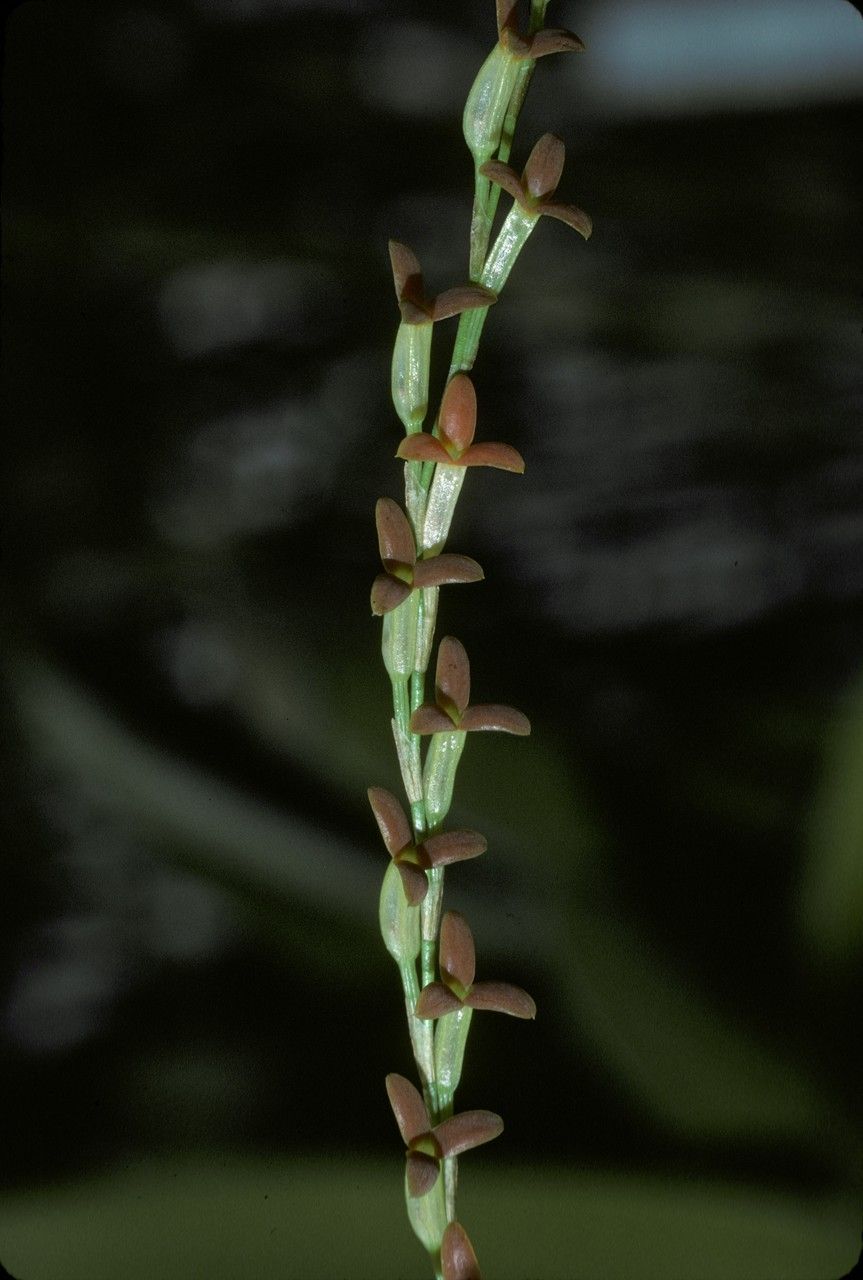
If you’ve fallen for those delicate, often richly colored blooms and the unique structure of Stelis emarginata, you’re not alone. This orchid can be a real showstopper in a collection. And the best part? You can multiply your joy by propagating it! Now, I won’t sugarcoat it – orchids, especially some of the more specialized genera like Stelis, can be a tad more challenging than your average houseplant for true beginners. But don’t let that deter you for a moment. With a little attention and the right approach, it’s absolutely achievable, and oh-so-rewarding. Imagine having an entire miniature jungle of these beauties!
When to Get Your Hands Dirty
The absolute best time to try your hand at propagating Stelis emarginata is during its active growth phase. For most orchids, this usually means after they’ve finished flowering and are starting to put out new leaves or pseudobulbs. In many climates, this translates to late spring or early summer. The warmer temperatures and longer daylight hours provide the energy young cuttings need to root and establish themselves. Trying to propagate when the plant is dormant or stressed is like asking someone to run a marathon on an empty stomach – it’s just not going to go well.
What You’ll Need for Success
Gathering your supplies beforehand makes the whole process much smoother. Trust me on this!
- Sharp, sterile pruning shears or a dedicated orchid knife: Cleanliness is key to preventing disease. A quick wipe with rubbing alcohol between cuts is your best friend.
- Orchid potting mix: A well-draining mix is paramount. I prefer a blend of fine orchid bark, perlite, and a bit of sphagnum moss for my Stelis. You want it airy but with enough moisture retention.
- Small pots or community trays: Orchid pots with good drainage holes are ideal.
- Hormone rooting powder (optional but recommended): This can give your cuttings a helpful nudge towards root development.
- Clear plastic bags or a propagator lid: These help maintain high humidity, which is crucial for new cuttings.
- Spray bottle: For misting.
- Perlite or coarse sand: Can be used for the propagation medium itself, or to cover the surface.
Bringing New Stelis to Life: Propagation Pathways
For Stelis emarginata, the most reliable method for propagation is division. This technique involves carefully separating a mature plant into smaller, viable sections.
Division Method:
- Gently remove the Stelis from its pot. If it’s been in the same pot for a while and is tightly bound, you might need to carefully break the pot or work through the roots to loosen it.
- Inspect the root system. You’re looking for sections that have at least two to three healthy pseudobulbs and their associated roots.
- Using your sterile shears or knife, carefully divide the rhizome. Try to make clean cuts without damaging too many roots. If there are old, dead leaves or pseudobulbs, you can trim those away to make it easier to see what you’re doing and to reduce the plant’s energy expenditure.
- Allow the cut surfaces to air dry for a few hours, or even overnight. This helps to callus over the wounds and prevent rot.
- Pot up each division. Place them in your prepared orchid mix into small pots. Ensure the new growth is facing outwards and the base of the plant is just at the surface of the mix.
- Water lightly. Don’t soak them immediately. Just a gentle watering or misting is enough to settle the mix.
While stem cuttings are common for many plants, Stelis orchids aren’t typically propagated this way due to their complex growth habit. Division is really your best bet for consistent success.
The “Secret Sauce”: My Gardener’s Insights
Here are a few little tricks I’ve picked up over the years that can really make a difference:
- Don’t overpot new divisions. It’s tempting to give them a nice big pot, but small divisions do better in smaller containers. It prevents the potting medium from staying too wet, which is a recipe for disaster.
- Humidity is your best friend, but airflow is its equal. Those clear plastic bags are fantastic for creating a humid microclimate, but make sure to open them up for a few minutes every day to allow for fresh air circulation. This prevents fungal issues from taking hold.
- Bottom heat can work wonders. If you have a seedling heat mat, placing your newly potted divisions on it can significantly speed up root development. Just make sure the heat isn’t too intense – lukewarm to the touch is perfect.
Aftercare and What to Watch For
Once your divisions are potted, keep them in a bright, indirect light location. Water them sparingly at first, only when the potting mix starts to feel dry. As you see signs of new growth – a tiny new root tip or a fresh leaf emerging – you can gradually increase watering.
The most common issue you might encounter is rot. You’ll see this as brown, mushy stems or roots. If you spot it, immediately isolate the affected plant. You may need to trim away the rotted parts with your sterile tools, making sure to get all the bad bits, and repot into fresh, dry mix. Sometimes, despite our best efforts, a cutting just doesn’t take. It’s part of the gardening journey!
Keep Growing, Keep Trying!
Propagating Stelis emarginata is a practice in patience and observation. Don’t be discouraged if your first attempt isn’t a runaway success. Each plant you grow from cuttings or divisions offers a unique opportunity to learn and connect with nature. So, get your tools ready, find that perfect plant, and enjoy the wonderful process of creating new life. Happy growing!
Resource: