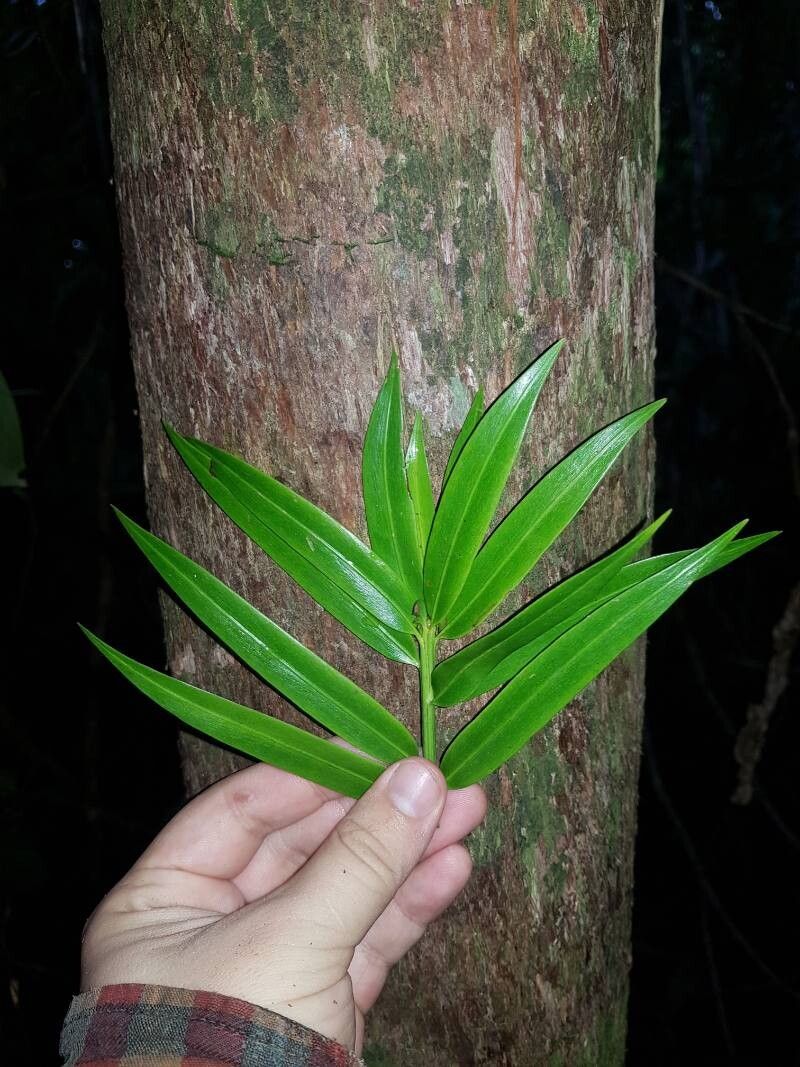
Hello, fellow plant lovers! I’m so excited to talk to you today about a plant that has truly captured my heart over the years: Podocarpus guatemalensis. You might know it by its common names, like Guatemalan Podocarpus or Mexican Yew. This evergreen is just gorgeous, with its graceful, tapering leaves and that lovely deep green hue. I’ve used it in so many gardens to create naturalistic screens and bring a touch of the tropics that can actually handle a bit of cooler weather.
If you’ve admired this plant and wished you could have more of it, you’re in luck! Propagating Podocarpus guatemalensis is incredibly rewarding. While it’s not the absolute easiest plant for a complete beginner to start from scratch, with a little patience and the right approach, you can definitely succeed. It’s a wonderful way to expand your collection or share these beauties with friends.
The Best Time to Start
For the highest success rate, I always recommend starting your propagated Podocarpus when the plant is actively growing, but not stressed. This usually means late spring through early summer. You want to tap into that vigorous growth spurt the plant experiences after winter. Softwood or semi-hardwood cuttings taken during this period have the best energy reserves to form roots.
Supplies You’ll Need
Gathering your supplies beforehand makes the whole process much smoother. Here’s what you’ll want to have on hand:
- Sharp Pruning Shears or a Craft Knife: For clean cuts.
- Rooting Hormone (Powder or Gel): This isn’t strictly essential for Podocarpus, but it does give your cuttings a significant boost. I find they root well without it, but with it, they tend to be quicker and more reliable.
- Well-Draining Potting Mix: A good blend of peat moss (or coco coir), perlite, and a bit of sand works wonders. You want something that holds moisture but doesn’t get waterlogged.
- Small Pots or Propagation Trays: Clean pots are key to preventing disease. 4-inch pots are usually a good size.
- Plastic Bags or a Clear Dome Lid: To create a humid environment for your cuttings.
- Labels and a Marker: Don’t forget to label your cuttings! Trust me on this.
- Watering Can with a Fine Rose: For gentle watering.
Propagation Methods
I’ve had the most success with stem cuttings for Podocarpus guatemalensis. It’s straightforward and yields great results.
Stem Cuttings: My Go-To Method
- Select Your Cuttings: Look for healthy, vigorous stems that are about 4-6 inches long. You’re aiming for semi-hardwood – the stem should be firm but still a little pliable, not completely woody and stiff. Avoid any stems with flowers or developing fruit.
- Make the Cut: Using your sharp pruning shears or knife, take a clean cut just below a leaf node (where a leaf attaches to the stem). This is where the plant is most likely to send out root hormones.
- Prepare the Cutting: Gently remove the lower leaves from the cutting, leaving just the top 2-3 sets of leaves. If the remaining leaves are very large, you can even snip them in half horizontally to reduce water loss through transpiration.
- Apply Rooting Hormone: Dip the cut end of the stem into your rooting hormone, tapping off any excess.
- Plant Your Cuttings: Fill your clean pots with your well-draining potting mix. Make a small hole in the center with your finger or a pencil. Insert the cut end of the Podocarpus cutting into the hole, ensuring the leaf nodes that were stripped of leaves are buried. Gently firm the soil around the stem.
- Water Gently: Water thoroughly until water drains from the bottom of the pot.
- Create Humidity: This is crucial! Cover the pot with a clear plastic bag, securing it around the rim with a rubber band, or place it under a clear dome lid. This traps moisture around the cutting.
- Find a Spot: Place your pots in a bright location that receives indirect sunlight. Avoid direct sun, as it can scorch your delicate cuttings.
The “Secret Sauce” (Pro Tips)
Over the years, I’ve learned a few tricks that really seem to make a difference:
- Don’t Let Leaves Touch the Water (If Water Propagating): While I primarily use soil for Podocarpus, if you ever try water propagation (which is less successful for them, but possible), make absolutely sure that no leaves are submerged. They will rot quickly and take the whole cutting with them.
- Bottom Heat is Your Friend: If you have the space, placing your pots on a heat mat designed for propagation can significantly speed up root development. This mimics the warmer soil temperature the plant experiences in its natural growing season and encourages roots to form faster.
- Patience is Key: Podocarpus guatemalensis isn’t the fastest rooter. Don’t be discouraged if you don’t see signs of growth immediately. I typically wait at least 6-8 weeks, sometimes even longer, before I start gently tugging on the cuttings to check for resistance, which indicates roots have formed.
Aftercare & Troubleshooting
Once you feel that resistance when gently tugging, or if you see new leaf growth, it’s a good sign your cutting has rooted!
- Acclimatize Slowly: Gradually remove the plastic bag or dome lid over a few days to let the new plant adjust to the ambient humidity.
- Watering: Keep the soil consistently moist but not waterlogged. Water when the top inch of soil feels dry.
- Transplanting: Once your new Podocarpus has a good root system and looks sturdy, you can transplant it into a slightly larger pot with fresh potting mix.
Troubleshooting is a normal part of gardening! The most common issue you’ll encounter is root rot. This usually happens from overwatering and poor drainage. If your cutting looks mushy, black, or is falling over with no signs of life, it’s likely rot. There’s not much you can do at that point except discard it and try again, making sure your soil mix and watering habits are good for the next batch. Another sign of failure is a cutting that shrivels and dries out. This usually means it didn’t form roots and lost too much moisture. Again, learn from it and try again!
So there you have it – a little guide to propagating your own beautiful Podocarpus guatemalensis. Remember, every gardener has their own learning curve, and yours will too. Don’t be afraid to experiment! The satisfaction of seeing a tiny cutting grow into a healthy new plant is truly special. Happy propagating, and enjoy the journey!
Resource:
https://identify.plantnet.org/k-world-flora/species/Podocarpus%20guatemalensis%20Standl./data