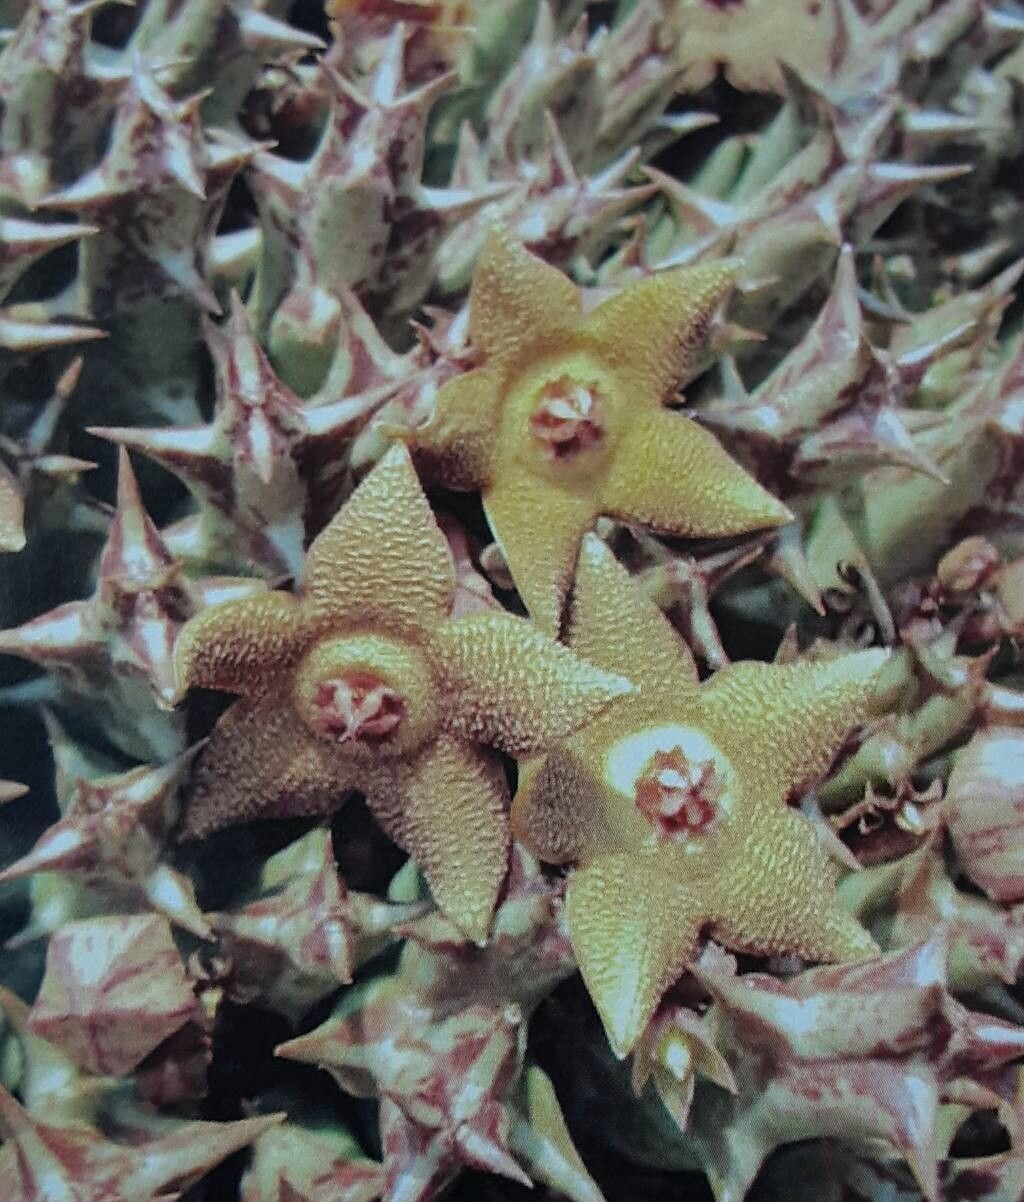
Hello, fellow plant enthusiasts! I’m so excited to chat with you today about a truly fascinating succulent: Orbea cooperi. If you’re looking for a plant that’s a little bit wild, a little bit strange, and wonderfully rewarding to grow, this is it. With its star-shaped, often speckled blooms and intriguing texture, the Orbea cooperi is a real conversation starter. And the best part? You can easily create more of these beauties yourself through propagation!
Now, if you’re new to the plant parenting world, don’t fret. Propagating Orbea cooperi isn’t about arcane rituals or secret spells. It’s quite manageable, even for beginners, once you understand a few simple things. Trust me, the satisfaction of watching your own little Orbea sprout and thrive is immense.
The Best Time to Start
For the highest success rate with your Orbea cooperi propagation, I always find it best to start in late spring or early summer. This is when the plant is actively growing and has the most energy to put into developing new roots. You can technically propagate them at other times, but you’ll likely see quicker, more robust results when the days are longer and warmer. Look for healthy, mature stems that aren’t too old and woody.
Supplies You’ll Need
Before we get our hands dirty, let’s gather our supplies. Having everything ready will make the process so much smoother.
- Sharp, clean pruning shears or a knife: For making neat cuts. Sterilize them with rubbing alcohol to prevent disease.
- A well-draining potting mix: I love a cactus and succulent mix, often amended with extra perlite or pumice for maximum drainage. Orbea cooperi hates sitting in soggy soil.
- Small pots or trays: Clean pots with drainage holes are essential.
- Rooting hormone (optional but recommended): This can give your cuttings a helpful boost to get them started.
- Watering can or spray bottle: For gentle watering.
- A warm location: A sunny windowsill or a spot with indirect bright light.
Propagation Methods
The most reliable and straightforward way to propagate Orbea cooperi is through stem cuttings. It’s incredibly effective and usually yields great results.
Stem Cuttings:
- Select a healthy stem: Choose a plump, mature stem from your parent plant.
- Make the cut: Using your sterilized shears or knife, make a clean cut just above a leaf node (where the leaves emerge from the stem). Aim for a cutting that’s at least 3-4 inches long. You can even take multiple cuttings from a single healthy stem.
- Allow to callus: This is a crucial step! Let the cut end of your cutting dry out and form a callus over for a few days (2-5 days is usually sufficient). Place it in a dry spot out of direct sunlight. This callused end prevents rot when you plant it.
- Apply rooting hormone (optional): Once callused, you can dip the callused end in rooting hormone. Tap off any excess.
- Plant the cutting: Fill your clean pots with your well-draining potting mix. Make a small hole in the soil with your finger or a pencil.
- Insert the cutting: Gently insert the callused end of the cutting into the soil, deep enough so it’s stable. You can plant several cuttings in one pot, giving them a little space.
- Water lightly: After planting, give the soil a very light watering. You want the soil to be slightly moist, not soggy.
The “Secret Sauce” (Pro Tips)
Here are a few little tricks I’ve learned over the years that can really make a difference.
- Don’t rush the watering: After planting your cuttings, resist the urge to water them daily. Let the soil dry out between waterings. Overwatering is the number one killer of succulent cuttings. Wait until you see new growth or the plant looks a bit thirsty before giving it a good, but still not soaking, drink.
- Bottom heat is your friend: If you’re propagating in a cooler environment, consider using a heating mat designed for seedlings. This gentle warmth from below encourages root development. Just make sure the ambient temperature isn’t too hot.
- The “wiggle test” is key: After 4-6 weeks (sometimes longer), you can gently tug on the cutting. If you feel resistance, it means roots have formed! If it comes out easily, it likely hasn’t rooted yet and needs more time.
Aftercare & Troubleshooting
Once you’ve successfully rooted your cuttings and they’ve started showing signs of growth – little nubs of roots, a new shoot appearing – it’s time to treat them as more established plants.
Continue to water sparingly, allowing the soil to dry out between waterings. When you water, water thoroughly until water drains from the bottom of the pot, then let it dry out again. Place them in a spot with bright, indirect light. They’ll often be small and somewhat delicate at first, so handle them with care.
The most common problem you’ll encounter is rot. If you see your cutting turning mushy, black, or develop foul odors, it’s likely due to overwatering or not allowing it to callus properly. Sadly, these often can’t be saved, but you can learn from the experience and try again. Another sign of failure is a cutting that simply shrivels up without any signs of rooting – this might mean it was too dry or didn’t have enough reserves to start with.
A Little Patience Goes a Long Way
So there you have it! Propagating your Orbea cooperi is a wonderfully accessible way to expand your collection or share these quirky plants with friends. Remember to be patient, observe your cuttings, and trust the process. Every little sprout is a triumph of nature, and you’re their guiding hand. Happy propagating!
Resource:
https://identify.plantnet.org/k-world-flora/species/Orbea%20cooperi%20(N.E.Br.)%20L.C.Leach/data